Hey there, let’s discuss about enable or disable Guided Switch policy in MS Edge browser using M365 Admin Center. The Guided Switch feature in Microsoft Edge makes it easier and safer to switch between different user profiles or accounts in the browser.
When the Guided Switch policy is enabled, it ensures that users are guided through a structured and controlled transition when changing profiles, which reduces the chance of accidentally leaking data or allowing unauthorized access.
This setting is useful for places where strict profile separation is less critical, or where admins prefer a less restrictive browsing experience. Here we are deploying this Guided Switch Policy in MS Edge Browser using M365 Admin Center.
By enabling the Guided Switch policy, companies can make things safer and more compliant while improving the user experience. Disabling the Guided Switch Policy in Microsoft Edge lets admins to turn off the guided profile-switching feature, giving users more flexibility when switching between accounts or profiles.
Table of Contents
Does the Guided Switch Policy Affect Guest Browsing?

No, this policy only applies to signed-in Microsoft Edge profiles. Guest sessions and InPrivate mode remain unaffected.
Enable or Disable Guided Switch Policy in MS Edge Browser using M365 Admin Center
The Guided Switch Policy is a security feature that controls how users switch between profiles in Microsoft Edge.
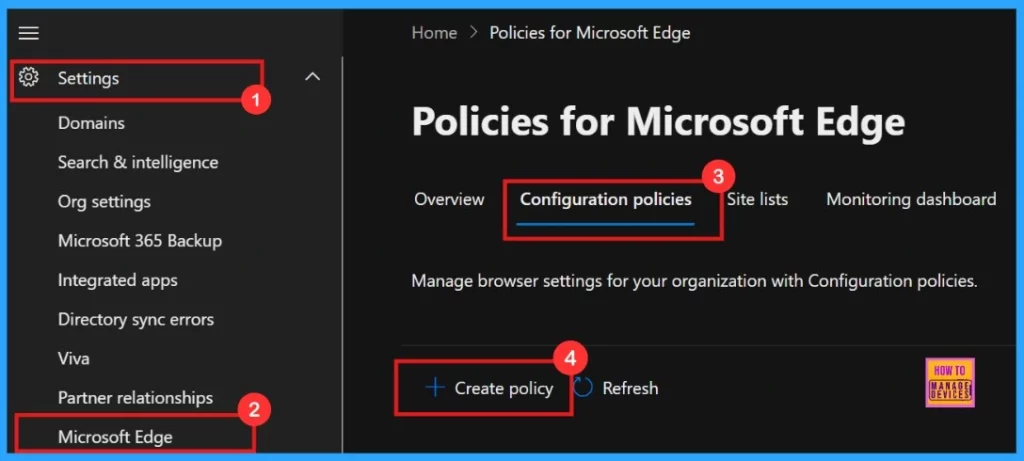
- Microsoft 365 Admin Center > Settings > Microsoft Edge > Configuration Policies > Create policy.
- Enable Disable Ask Before Closing a Window with Multiple Tabs Policy in Edge Browser using M365 Admin Center
- Enable or Disable Audio Sandbox to Run Policy in MS Edge Browser using M365 Admin Center
- Enable or Disable Background Template List Updates Policy in MS Edge Browser using M365 Admin Center
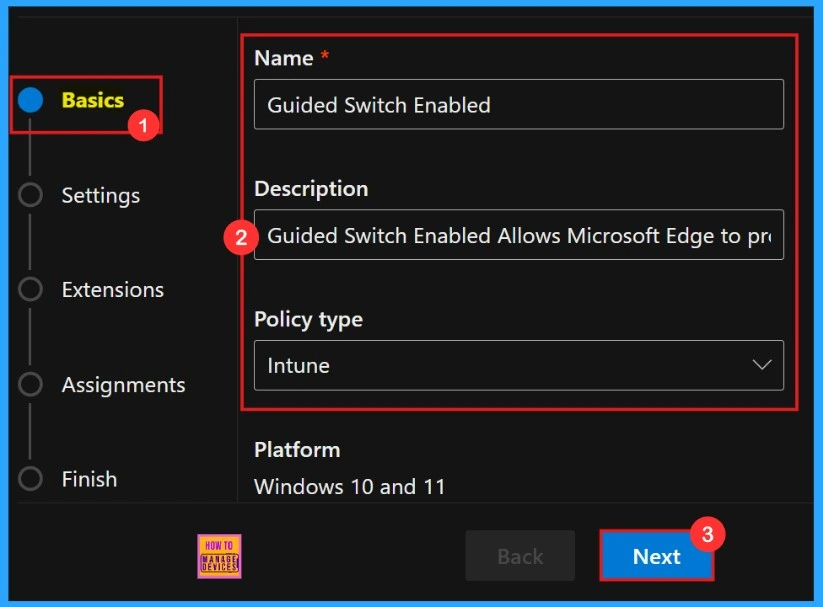
Basics
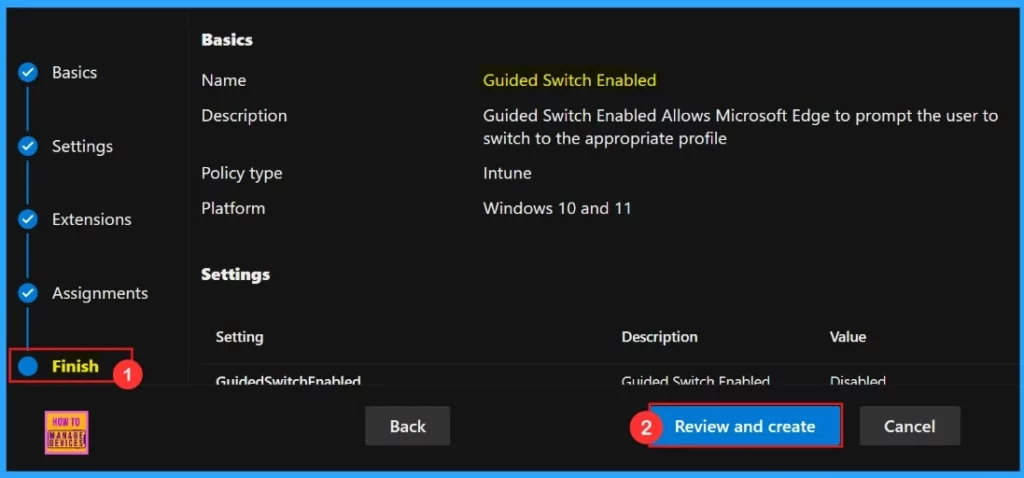
When configuring policies in the Basics section, it’s important to assign a clear, descriptive name and provide a detailed explanation for the policy. Here policy name is “Guided Switch enabled”, and Given a description to the policy for easily identifying.
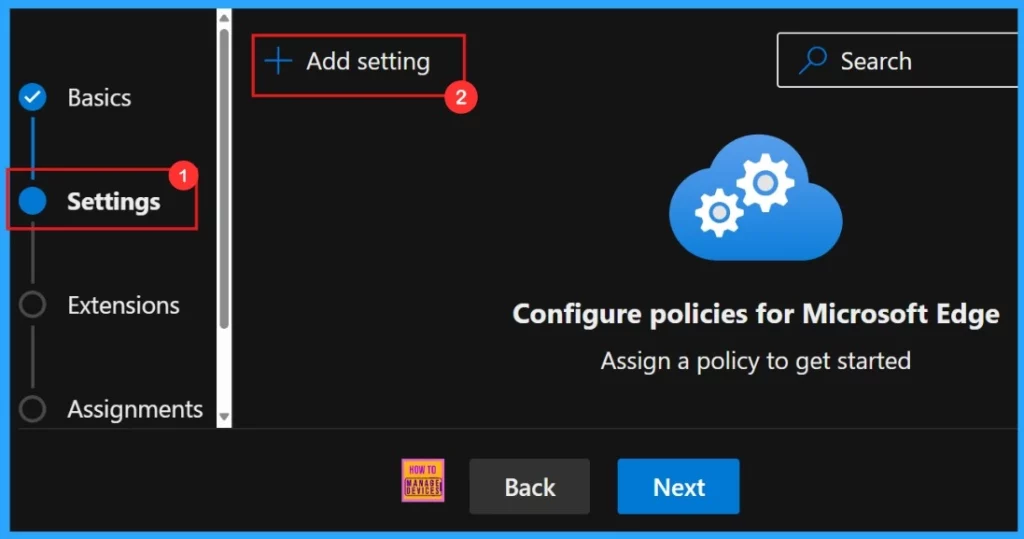
Settings
In the Settings tab of our policy configuration, need to click “Add settings“. Then we need to search for the policy we want to deploy from Additional settings.
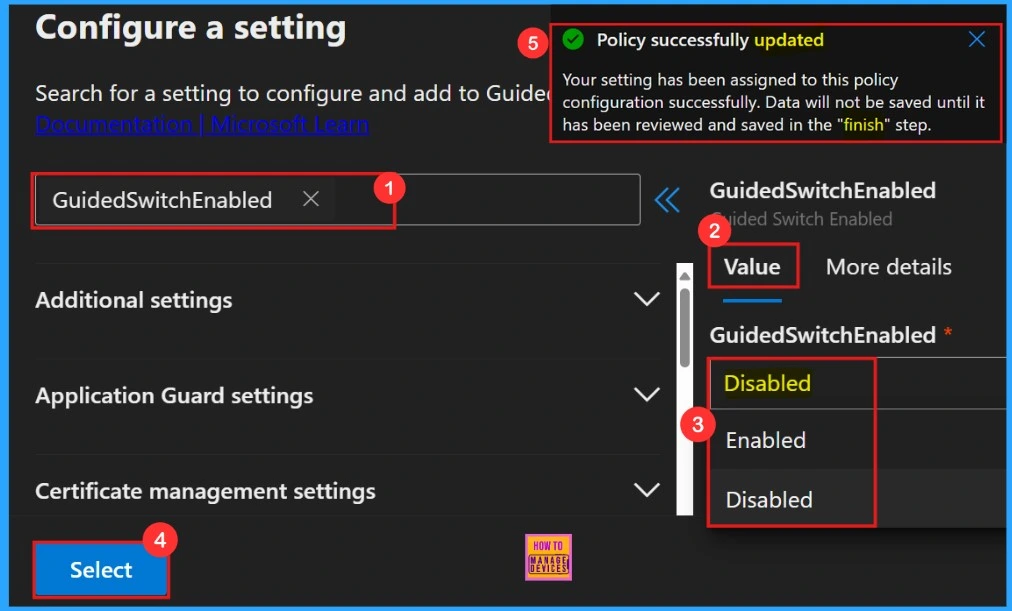
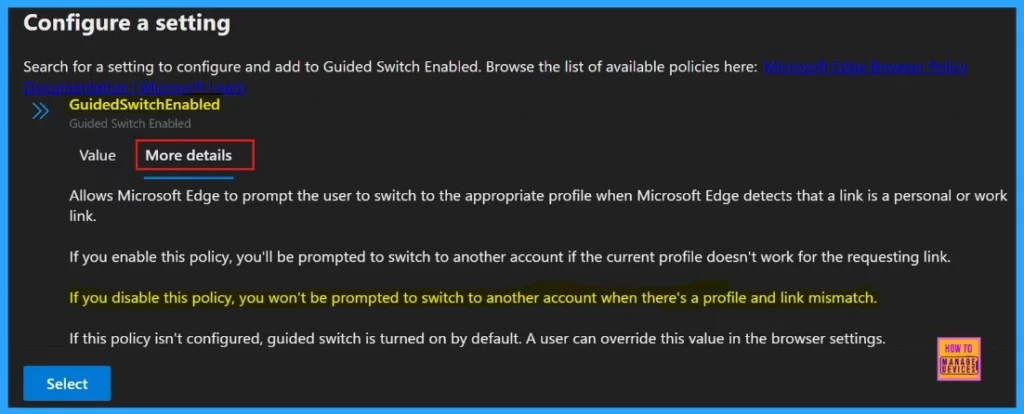
Configure a setting
To configure the policy, search for the policy by name. Then Value tab will open where we can select between Enabled and Disabled options. For our purposes, we choose disabled.
More Details
To better understand the policy’s purpose and functionality, click “More Details” to view its complete description, including technical specifications and implementation guidance.
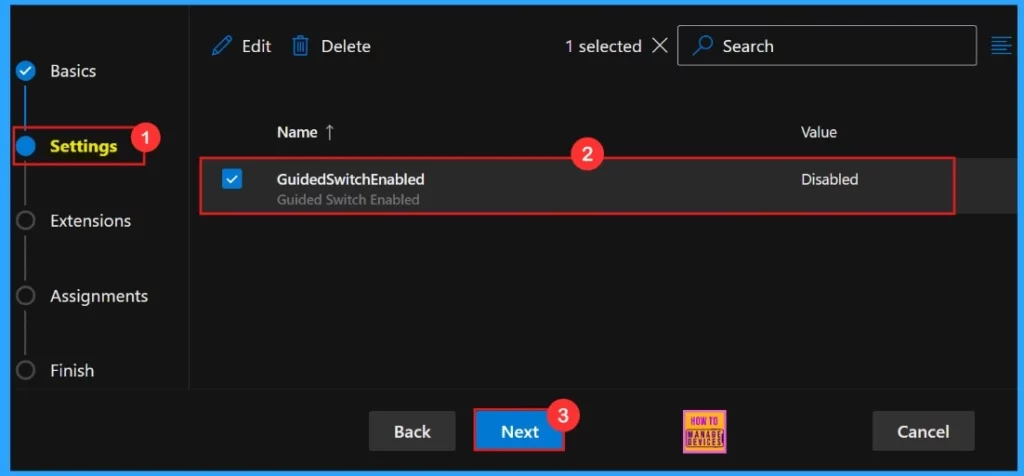
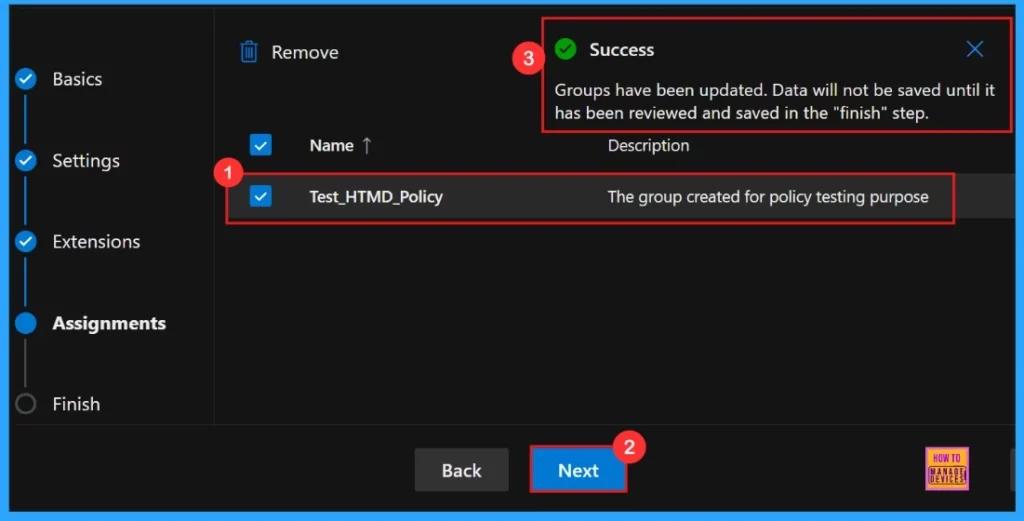
To enable the policy, simply check the box beside its name in the list, then click Next to continue with the configuration process. This action confirms our selection and moves us forward in the policy setup workflow.
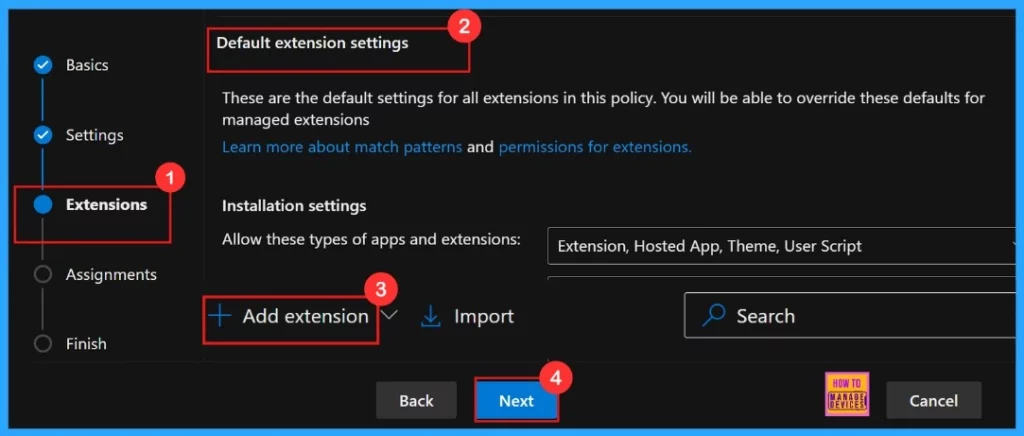
Extensions
The Extensions section allows us to customize your policy by adding specific extensions, which include settings for installation, permissions, and URLs. If the policy requires additional functionality, we can add extensions by clicking + Add extension. However, if no extensions are needed, we can simply skip this section.
Assignments
The Assignments tab serves as the control center for targeting your policy deployment. By selecting a group, we can limit the policy’s application to only those users.
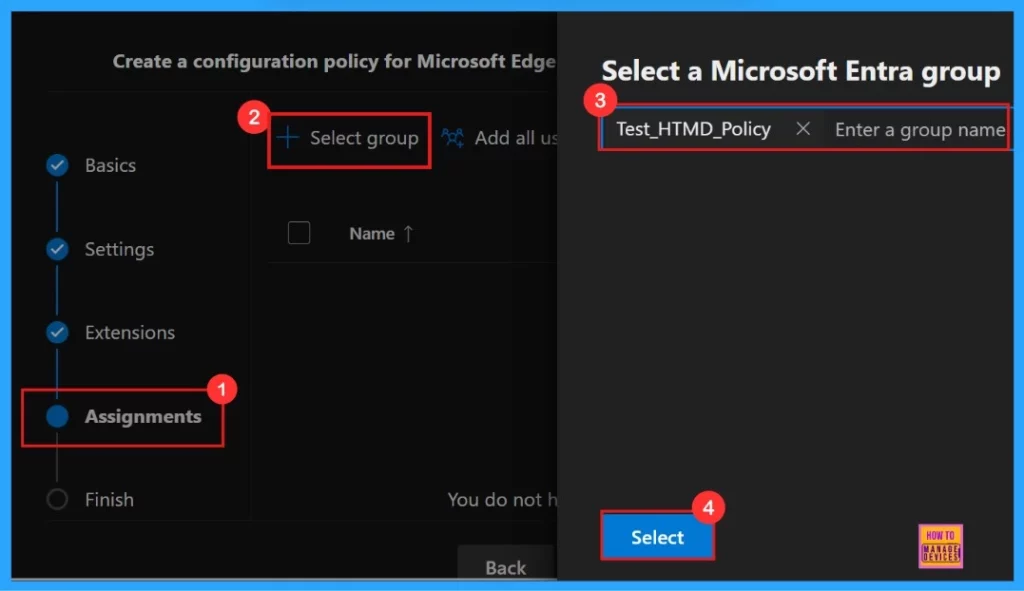
After the selection of the group from the Microsoft Entra groups, a notification will appear on the page confirming that the group has been updated. Here we assigned the group Test_HTMD_Policy.
Finish
To complete the policy configuration, click Review + create to verify all settings before final deployment. The summary screen displays our configured options including assignments, rules, and exceptions allowing for a final quality check. Once confirmed, click Create to activate the policy.
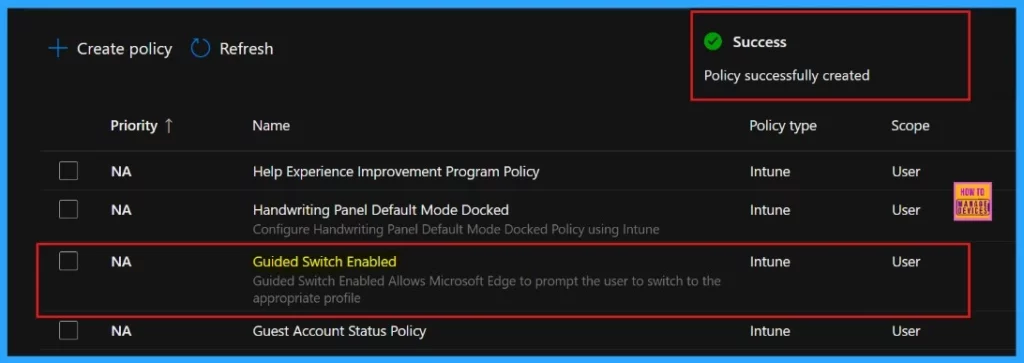
After you click on Review and Create, the portal will display a success message confirming that the policy has been created successfully. The new policy will then be visible in the Configuration Policies section.
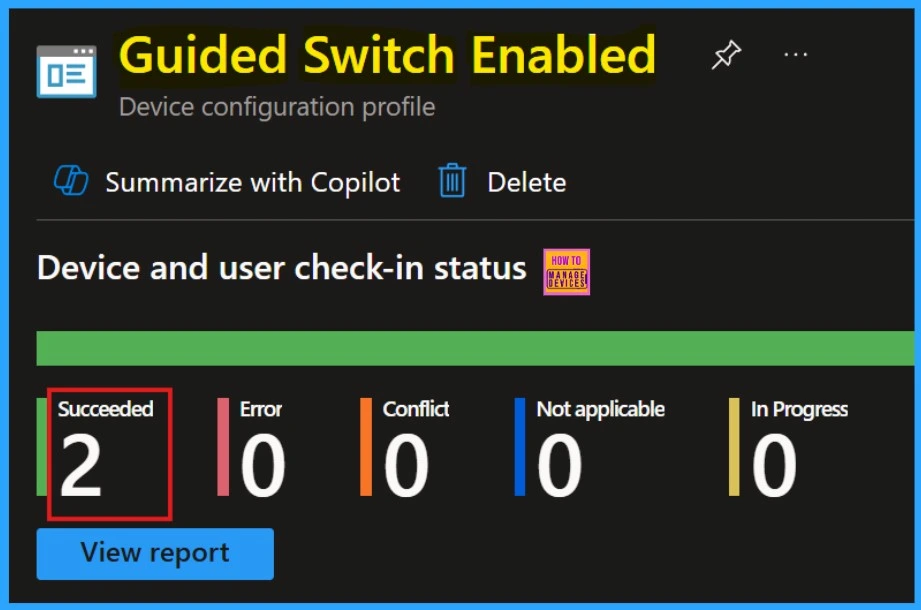
Device and User Check-in Status
After manual sync on the Company Portal, we can confirm the successful deployment of the policy within the Intune Portal.
- Go to Devices > Configuration >Policies >Status > succeeded
Client-Side Verification through Event Viewer
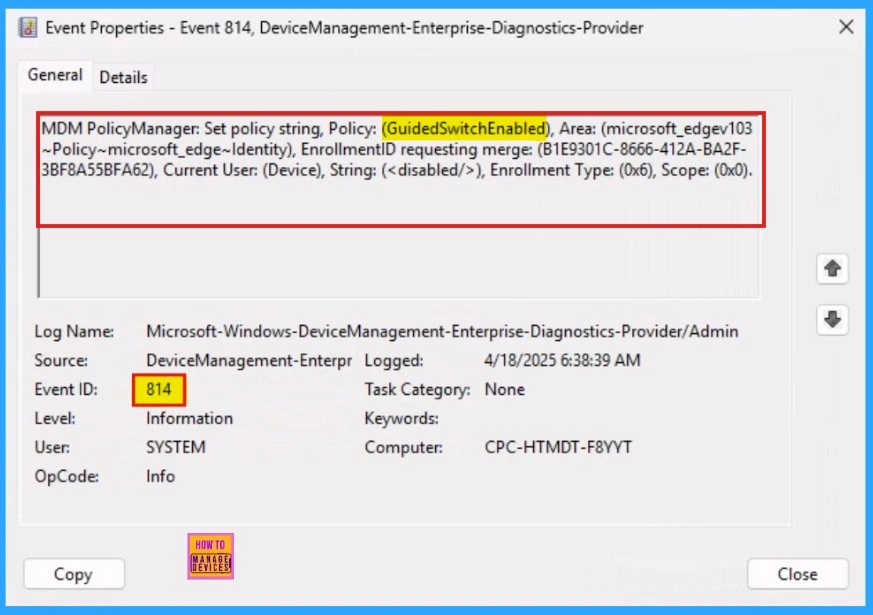
To confirm policy enforcement on individual devices, administrators can use Windows Event Viewer for client-side verification. Navigate to Applications and Services Logs > Microsoft > Windows > DeviceManagement-Enterprise-Diagnostics-Provider > Admin and filter for Event ID 814.
Need Further Assistance or Have Technical Questions?
Join the LinkedIn Page and Telegram group to get the latest step-by-step guides and news updates. Join our Meetup Page to participate in User group meetings. Also, Join the WhatsApp Community to get the latest news on Microsoft Technologies. We are there on Reddit as well.
Author
Anoop C Nair has been Microsoft MVP for 10 consecutive years from 2015 onwards. He is a Workplace Solution Architect with more than 22+ years of experience in Workplace technologies. He is a Blogger, Speaker, and Local User Group Community leader. His primary focus is on Device Management technologies like SCCM and Intune. He writes about technologies like Intune, SCCM, Windows, Cloud PC, Windows, Entra, Microsoft Security, Career, etc.
